Princes School of Traditional Art, London
Icon Landscape Painting Course
Tutor:
Irina Bradley studied at the Prosopon School of Iconograhy, Russia. PHD student at the PSTA
15th- 19th August 2011
10.30 - 5.30
Day 1
Given a brief lecture and slide show on the history and theory behind Russian Byzantine Iconography from the Prosopon School.
It is different to the Greek technique in many ways especially that the Prosopon technique lets the light through the layers.
I meet 6 other students from Uk and Brazil.
We started with traditionally prepared gesso on wooden board. Traditional boards are prepared by Russian Masters who are trained to only do this bit of the Icon. Very Symbolic. Lime is used generally and supports of oak are glued in place on the back. This stops the board warping. This is often done in the cross shape too which is obviously symbolic but also strengthening. This board was prepared by a master in Russia to a extremely high standard. You cannot get them in the uk.
Muslin is washed 7-8 times to allow for shrinkage and is then glued to the sized board.
In the Uk and Italy gesso is traditionally made from rabbit skin glue crystals and whiting powder (gypsum) Titanium white can be added and for a more flexible surface linseed oil. However the best quality Russian boards are sized using Sturgeon bladder glue. It is stronger apparently and a much superior quality. This is also used to clarify wines, beers and other liquids. Sorry vegetarians!
Once the muslin is glued to the board the gesso is prepared gently in a double boiler and applied to the board. Up to 10 layers are brushed on in alternate directions and once dry sanded to a very smooth surface.
Some icon panels are arched or can be other elaborate shapes, they often have a sunken central area. This is painstakingly carved and sanded out and then primed as above.
There are already very symbolic rituals related to this preparation. It is totally spiritual and prayers, meditation and complete focus is paramount. Perhaps this is why I love preparing gesso and my boards, even before I associated it with Religion. My parents are Atheist and I was kept out of RE classes and assembly at school. Which now makes me feel very ignorant when it comes to religion. I do understand why they did this as the teaching was more than a little biased and the bloke was a pillock. It did however leave me with a tolerance, rather than intolerance for all religions and an openess to understand different cultural heritages. Obviously experiences good and bad in life make you appreciate a more spiritual side to life. It opens a door so to speak, if you let it. Any way off on a tangent a bit there.
Gesso the first layer of an Icon represents the beginning, birth, purity and especially light. Obviously muslin, the shroud and I'm sure to Russian Orthodox Christians much more.
Step 1. We all had a photocopy of the drawing and had to tarnsfer it onto the board with carbon paper. Strangely meditative and actually a challenge for me to do as I'm told and follow the tutors instructions. We are all meant to have exactly the same image no room for creativity or experiments, that is not the point. As Irina put it. If the rules aren't adhered to and passed on properly all is lost. Iconography is a language after all. Being able to read an icon is amazing as everything in it, shape, colour, form has meaning.
Step 2. We then had to score the drawing into the gesso surface and then rub off the carbon until clean and white again. This was time consuming and it was a complex image that in the end we had drawn 3 times over.
Step 3. Mixing the egg tempera and grinding the pigments.
This table was a beautiful way to be greeted each morning. The light coming through the window and all the raw pigments awaiting us. Magic.
An ancient artist working at his painting perceived himself as
a creator. In his search for original ways of self-expression, he experiments
with different materials and techniques as part of that expression. However, the
ancient iconographer sees himself as part of creation — the visible universe
created by God. The icon painter submits his will to the Creator of all things.
Therefore, in his works he uses the materials God made through the creation of
the world. Medieval icon painters made abundant use of natural pigments — both
mineral and organic. In Russia, even today these materials are perceived as the
most practical and permanent, having survived many years of exposure to the
elements. So one still finds in Russian iconography natural clays and minerals
used as pigments. From them the iconographer prepares colors with a binding
agent — egg yolk — the egg representing the beginning of life.http://www.naturalpigments.com/education/article.asp?ArticleID=7


Grinding the pigments takes alot of patience and effort. But very rewarding. The colours are just beautiful. I am someone who normally uses a very muted palette and I feel colour adds another complication to my process. Is this still my feeling having done this course? Hmmnnnn. We'll have to see in my new paintings!
Pigments
Earth pigments (ochre, blue earth, green earth) Absorb light.
Minerals (lapis, azurite, cinnabar) reflect light
The pigments used in early Icon painting.
White lead, cinnabar, ochre, soot ( birch/grape or beech tree)
Red lead, Verdegris, lapis.
Step 4 Test and test again was Irina's rule. The first layer should have lots of crystals in the egg tempera. Very fluid and darkest layer. Dark to light in very transparent layers. Applied in a very fluid brush movement. Meant to symbolise the chaos of creation. The effect should look like it has not been created by the hand of man or woman! No brush strokes or uniformity should show. The more texture and grittiness the better. Do not go over a mark you have already made or it will lose the light shining through the chaos.
Some pigments in jars, on the right is Limonite which adds the texture or crystals to the first layer.
Carefully painting to the scored drawn areas, everybody intensely following Irina's instructions. 10 min lunch break and then straight back on it!
In the Prosopon school you would not be allowed to mix your pigments for a long time. You would have to master the painting first. It is seen as a very masterly, important and complex part of iconography. Irina however encouraged us to have a go. The pigments are quite precious and very expensive and some rare ( ie you can't buy them in this country or at all). Irina said it is handy to know the odd geologist who goes on fields trips. They might track down a lump of something for you. Irina tries to only use natural materials in her Icons.
some are very toxic so health and safety was important.
Day 2
The first layer is now dry and the first thing to do is clean off all the gritty crystal of limonite. You can either rub with you hand or using a palette knife. You have to be very careful though as you can scratch the surface. It's very important to wash your hands. After all the texture is removed, the light shines through from the gesso surface beautifully.
My first layer next to Irina's completed example.
So on with the second layer. It's day 2 and I got a go at making the egg tempera
Making the egg tempera, Irina's method
Crack an egg pouring the yoke into your palm without breaking it.
Roll from one palm to the other gently until all egg white has poured away.
Repeat until the yolk air dries.
Pinch the yolk bag with two fingers whilst piercing the underneath with the other hands nails. Catch the yolk in a clean container discarding the yolk sack.
Add a tablespoon of white wine vinegar or white wine.
Add the same quantity again of water, distilled if you have it but not essential.
This should keep for up to 2 weeks in the fridge.
Now just add pigment.
This is the second days work and we were all shattered. It's such intense work. Painting non stop all day. Irina is a fantastic teacher and nobody sat waiting for pigments or instructions even though we were going at our own pace.We really havn't chatted or got to know other students much as we're all concentrating and it's very meditative in process.
Went over yesterday areas with purer lighter pigment washes or veils with lots of sparkle.There are two types of roskrysh techniques in Russian icon painting. One method
is to load the brush with color and place it in a small pool on top of the
levkas. Then with the tip of the brush the edges of color is expanded to fill in
the areas of the form. This method is also known as petite lac. The
second technique is to apply the tempera paint in many transparent layers or
glazes, known in Russian as lessirovochnogo (лессировочного). Each
transparent layer of pigment on an icon must be very thin. A squirrel brush should be used. Irina mentioned about an unusually hot summer in Russia where all the squirrels died of the heat. She says it's difficlut to get brushed since then. Poor little blighters, if it's not the heat you get made into a brush (for gods sake! Ha) or in this country you're just a pest!
Started first highlights and outlining. Irina talked about chaos yesterday and a language or writing today. Outlining and defining the subject. Describing or intellectualising it. Then we added more light and meaningful form and colour. A really hard day, real focus and complaints about not enough light in the room.
Today i had a doubting feeling. This practice is all about putting your whole into the painting. If i am not a Christian let alone an Orthodox Russian one, am I still justified to do this. I think I still put all of my heart and soul into it but there is something about having that deep belief in Iconography or any other religious art practice.
Do I need to remember that the work is being made to allow me to get an insight into the practice, to allow me to connect with my spiritual inner through my creative outer? The journey is very important.
There is something very important I feel about making art from the heart, the soul of you. It also is tremendously good for my well being and is nourishment. Allowing my heart and soul to swell. (this is what I wrote in my diary after day 2 and meditating that evening). Pah, some might say.
This was written on the wall of the classroom about education and I found it interesting.
Worldly material education
1. Caters to the mind and intellect
2. Promotes desires and attachments, heads to a state of 'Ashanti' or lack of peace of mind
3. Develops the ego and produces anger and unhappiness.
4. Makes one unduly happy when successful and utterly desperate when unsuccessful
5. Helps to conquer the aspects of the outer world
6. Gives information and knowledge
Spiritual education
1. Goes direct to the heart
2. Helps to elliminate desires and gives detachment and 'shanti' or peace
3. Deflates the ego and produces tranquility and happiness
4. Teaches the method of facing both success and defeat in equal measure.
5. Helps to conquer oneself
6. Gives humility and wisdom
Day 3
Really focussed on the water today and the details. Using beatiful crystal pigments and white we defined the cntres of the trees. Always drawing light from the centre. the water needed defining using white from the centre of the spiral. Irina said her master describes it as angels breath, flowing in and out at the same time.
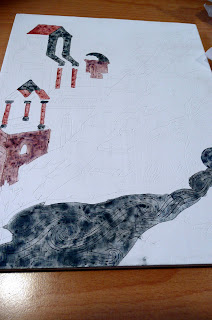
Added more light to the rooftops and detail of the building.
Day 4
Today we added alot more detail to the structure and more veils of wash over the mountains. We added dots of shading to the pillars ( although officailly there should be no shadows in an Icon). We highlighted the steps in the mountain again, going around the edges making it more uniform and squared off. We added more dark blue to the water to define the angels breath or swirls.
Day 5
Added the final, almost clear washes and defined higlights with white. We painted with pure gold leaf ground down for the dark windows into the buildings which represent our inner structure and Bethlehem. Once dried we burnished them to a high sheen with agate. We did a light wash over the background to make it real sparkle. Used ruler to go over straight lines in white. Wrote in the title in Russian 'Bethlehem'. Or that's what Irina said. Might say 'amateur' or 'try harder next time' for all i know! All Icons have to have a name or title generally written in red for it to be properly finished. The border of clay bole and dark green were added 3mm width each. The green was a really gritty mix and hard to paint with. Especially again a very staright line. It needed several coats!
The Icon needs oiling but you should leave an Icon several weeks or even months before doing this.
This is the final stage and with large Icons the most treacherous. It can be extremely difficult oiling an icon. Its the last step and also very symbolic. Think of annointment and such practice. Irina describes when an Iconographer thinks they have finished, they have put all of themselves into it. Abstained from alchohol and meat for the duration. Committed themselves to it completely. This relaxation and feeling of completing means it can go terribly wrong. It reminds me of a conversation I had with a frend Nigel Robinson. He is an amazing person, he has climbed the north face of the Eiger. Climbers don't tend to have accidents or fall to their death on the way up a mountain, but on the way back down! He described the feeling climbers have when they've battled to reach the summit. Ecstatic and awestruck they relax, feeling they have accomplished what they set out to conquer. It is at this point most climbers die, when they lose focus, relax and don't take the journey back down as seriously and with as much determination.

As you can see everyone's finished Icons were very similar and very beautiful. Alot of serious commitment and passion had gone into them. In reality this image would be a background in a much larger Icon.
Next Blogpost will be oiling an Icon and tips for meanings.
.jpg)


.jpg)
.jpg)


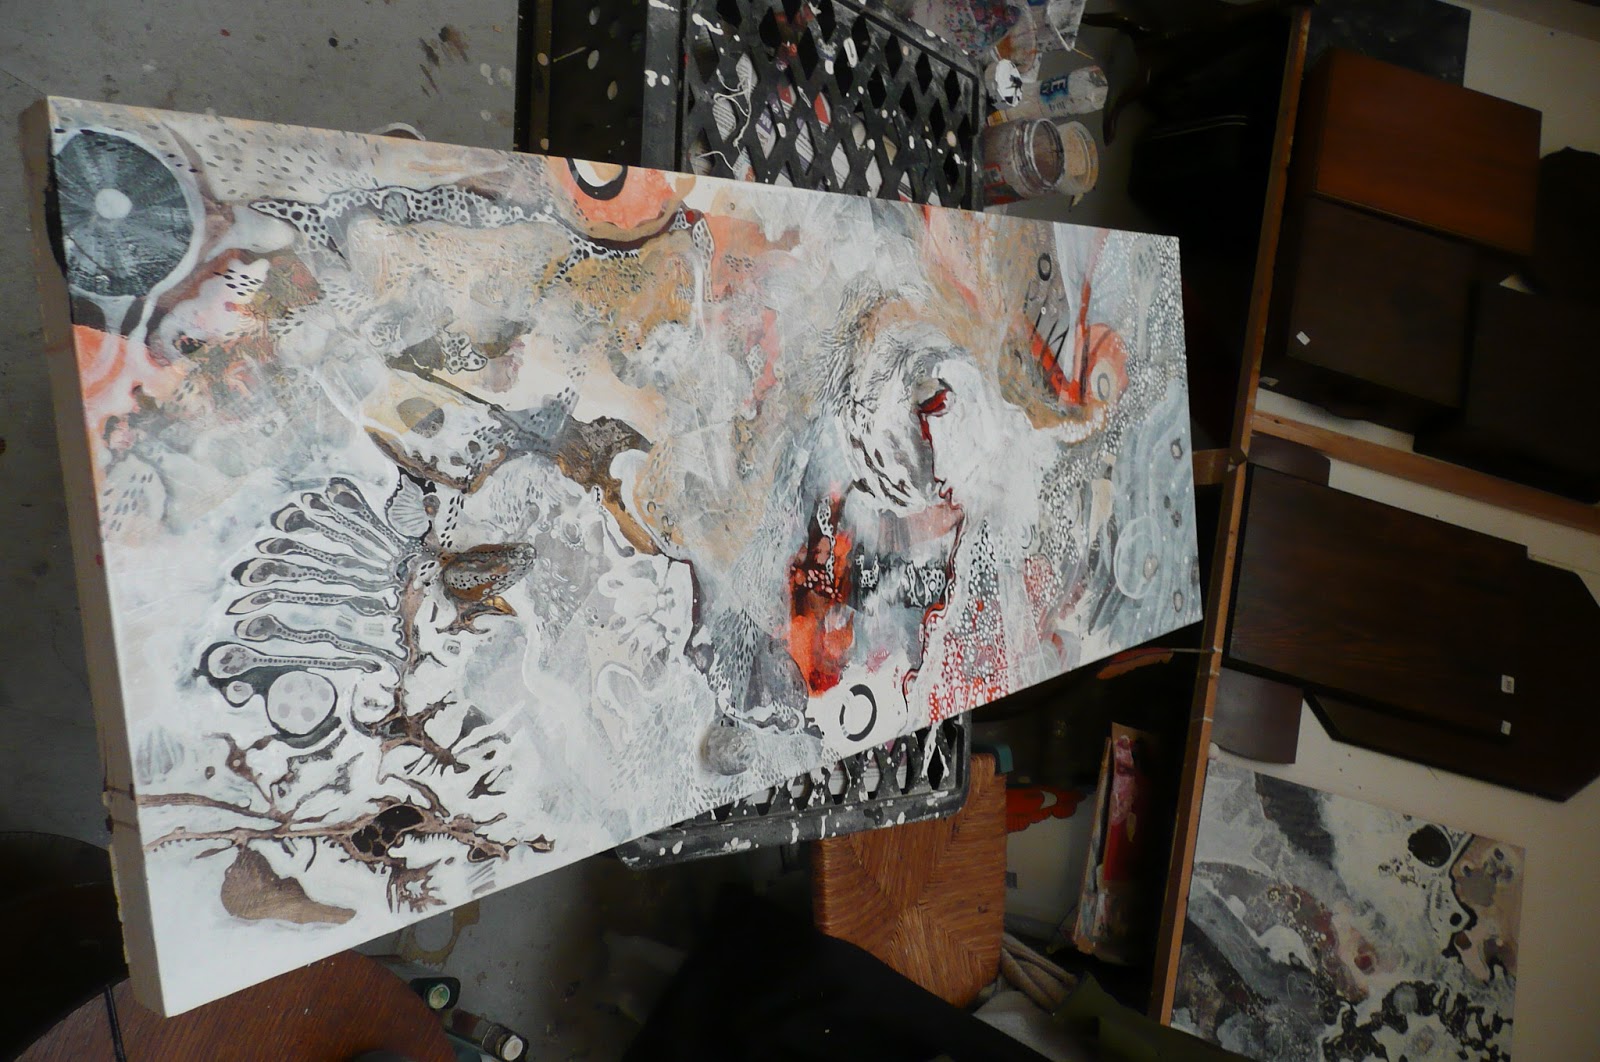 This one needs many more layers but is getting there. It's the same painting from the earlier blog but they need to be worked and worked before i think they are finished.